The idea
Most of the plastic bottles I use never get recycled into anything useful. This machine is my attempt to close that loop myself: take a discarded PET bottle and turn it into filament a 3D printer can use. I self-funded the build, at a little over $300.
It has four parts. A cutter slices the bottle into one long strip of even width. A hot end softens the strip and folds it into a round section the size of standard filament. A motorised reel pulls the strip through and stores the result. A controller holds the hot end at temperature and sets the reel speed. The PET is never fully melted, only warmed enough to fold over into a tube.
The design behind it
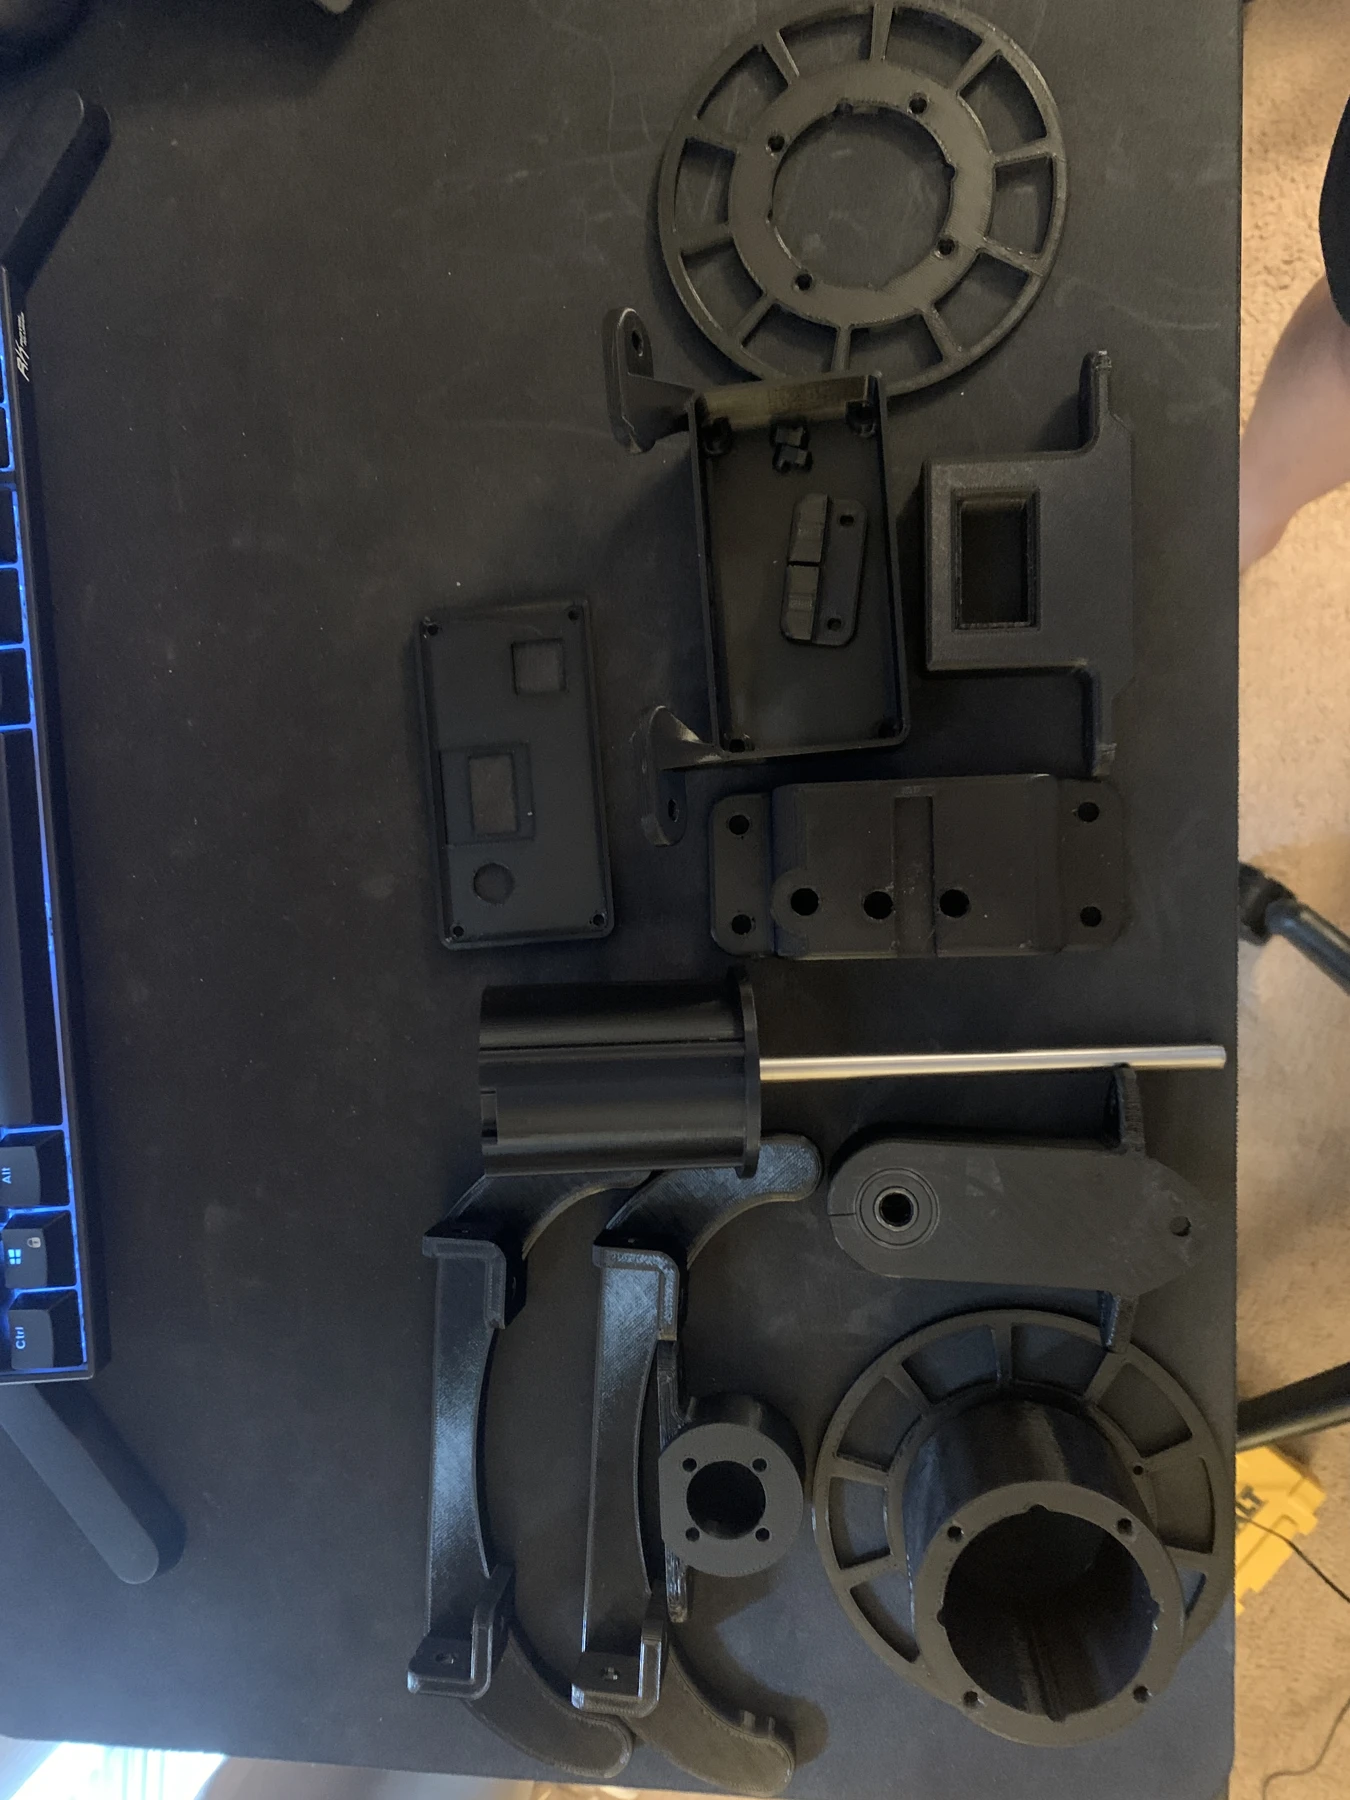
I built this from PET2Print, an open design published in 2023 by thediylife, and the printed parts follow it. What is mine is the build: printing and assembling the machine, wiring the electronics, moving the control circuit from a breadboard to a soldered controller board, and tuning the firmware settings for my setup.
How the cutter works
In this design the cutter is two ordinary 608 skate bearings with one face ground sharp. A printed base holds them at a fixed gap, a metal strip under them saves the base from wearing away, and a printed guide keeps the strip in line as it heads for the hot end.
The hot end
The hot end is a standard 0.4 mm nozzle drilled out to just under 1.6 mm, because filament swells slightly after it leaves the nozzle and the target is 1.75 mm. The back of the heat block is opened with a tapered bit, so the strip’s edges fold over gently on their way in. Plywood plates keep the mounting screws from melting the printed holder.
The controller
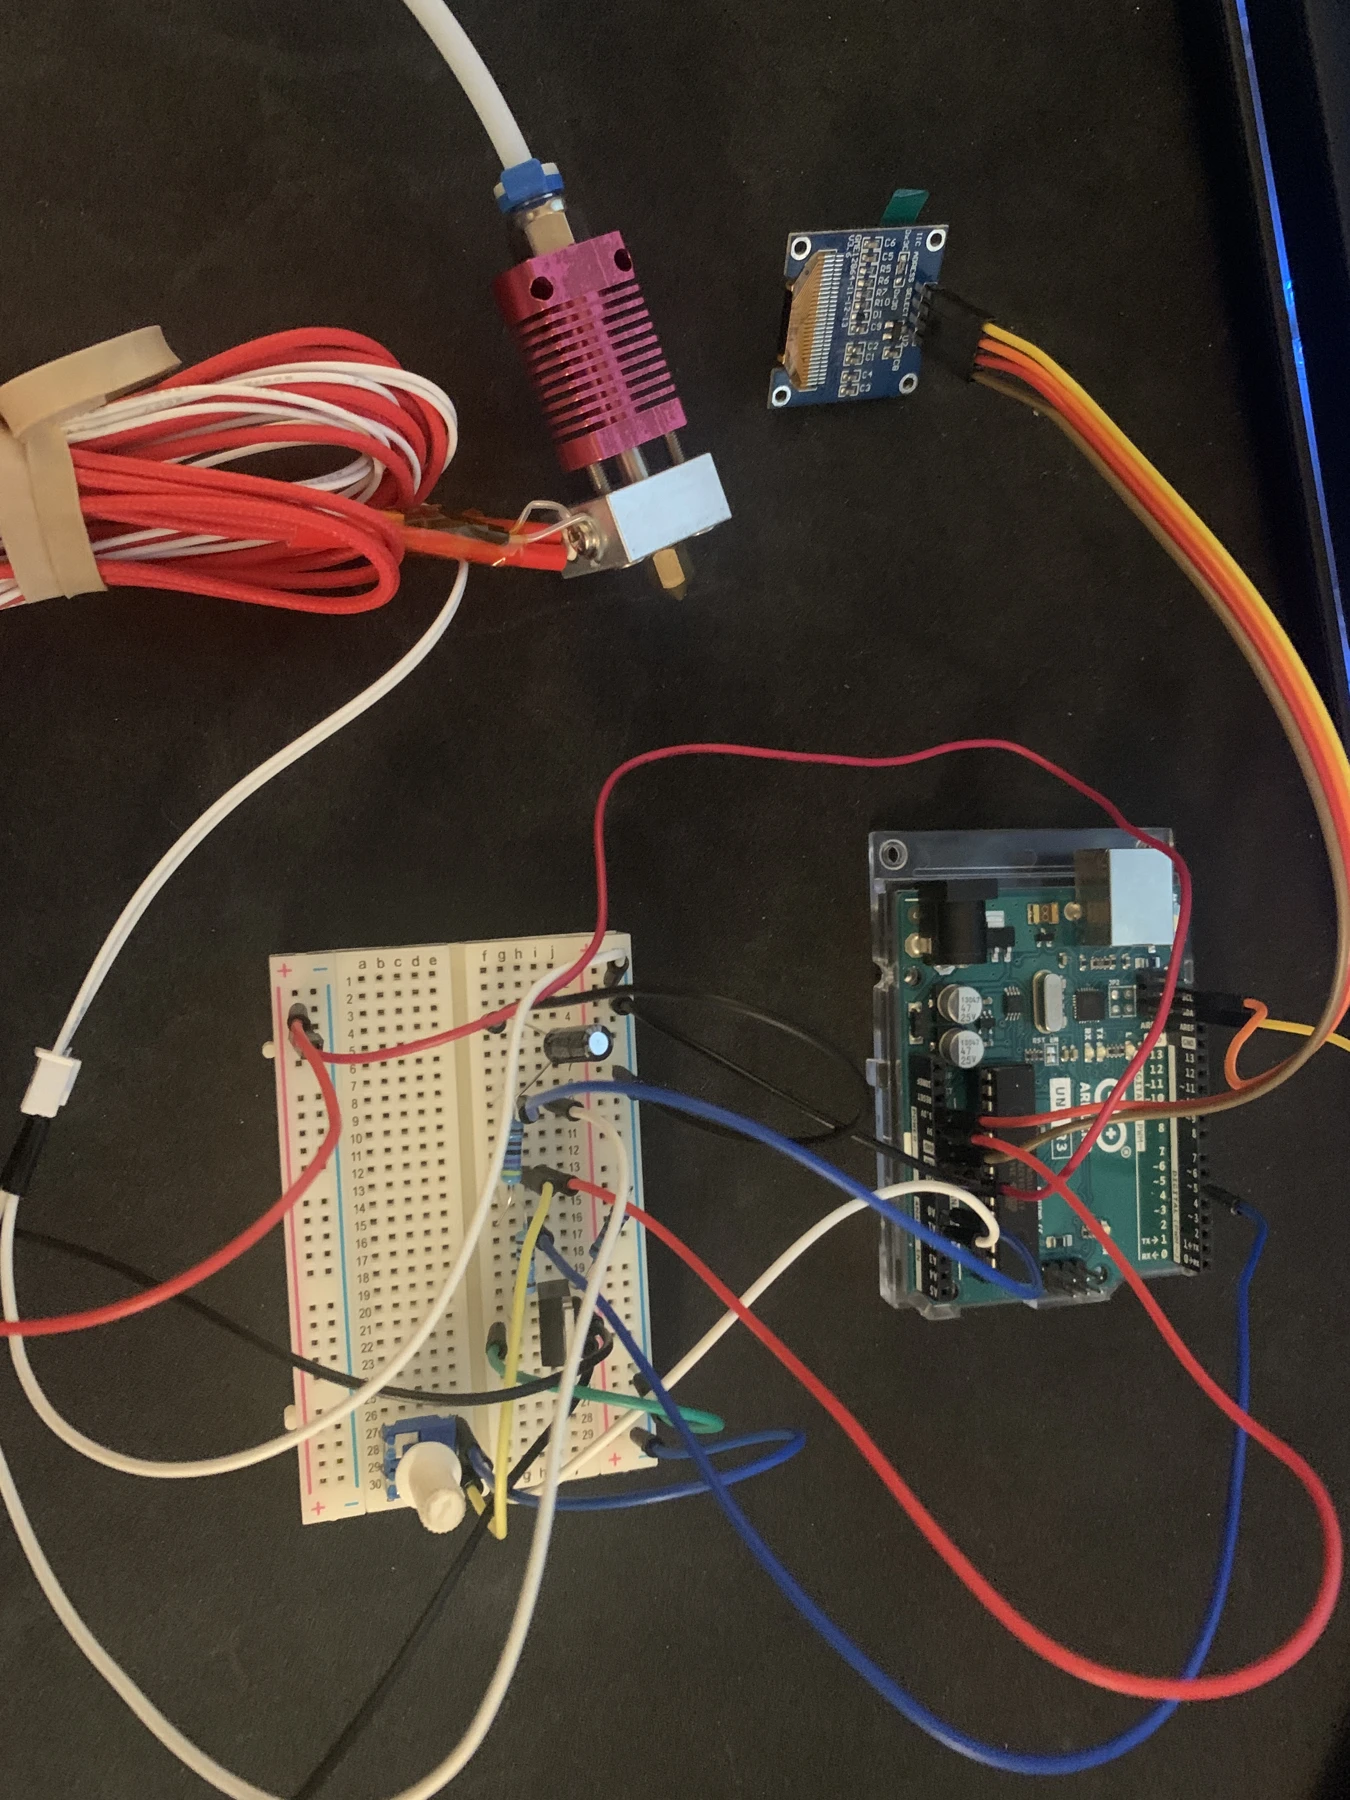
The control loop started on a breadboard: thermistor, PWM heater output, stepper driver, rotary encoder and an SSD1306 display, all wired by hand so I could prove the logic before committing to a board.
From breadboard to board
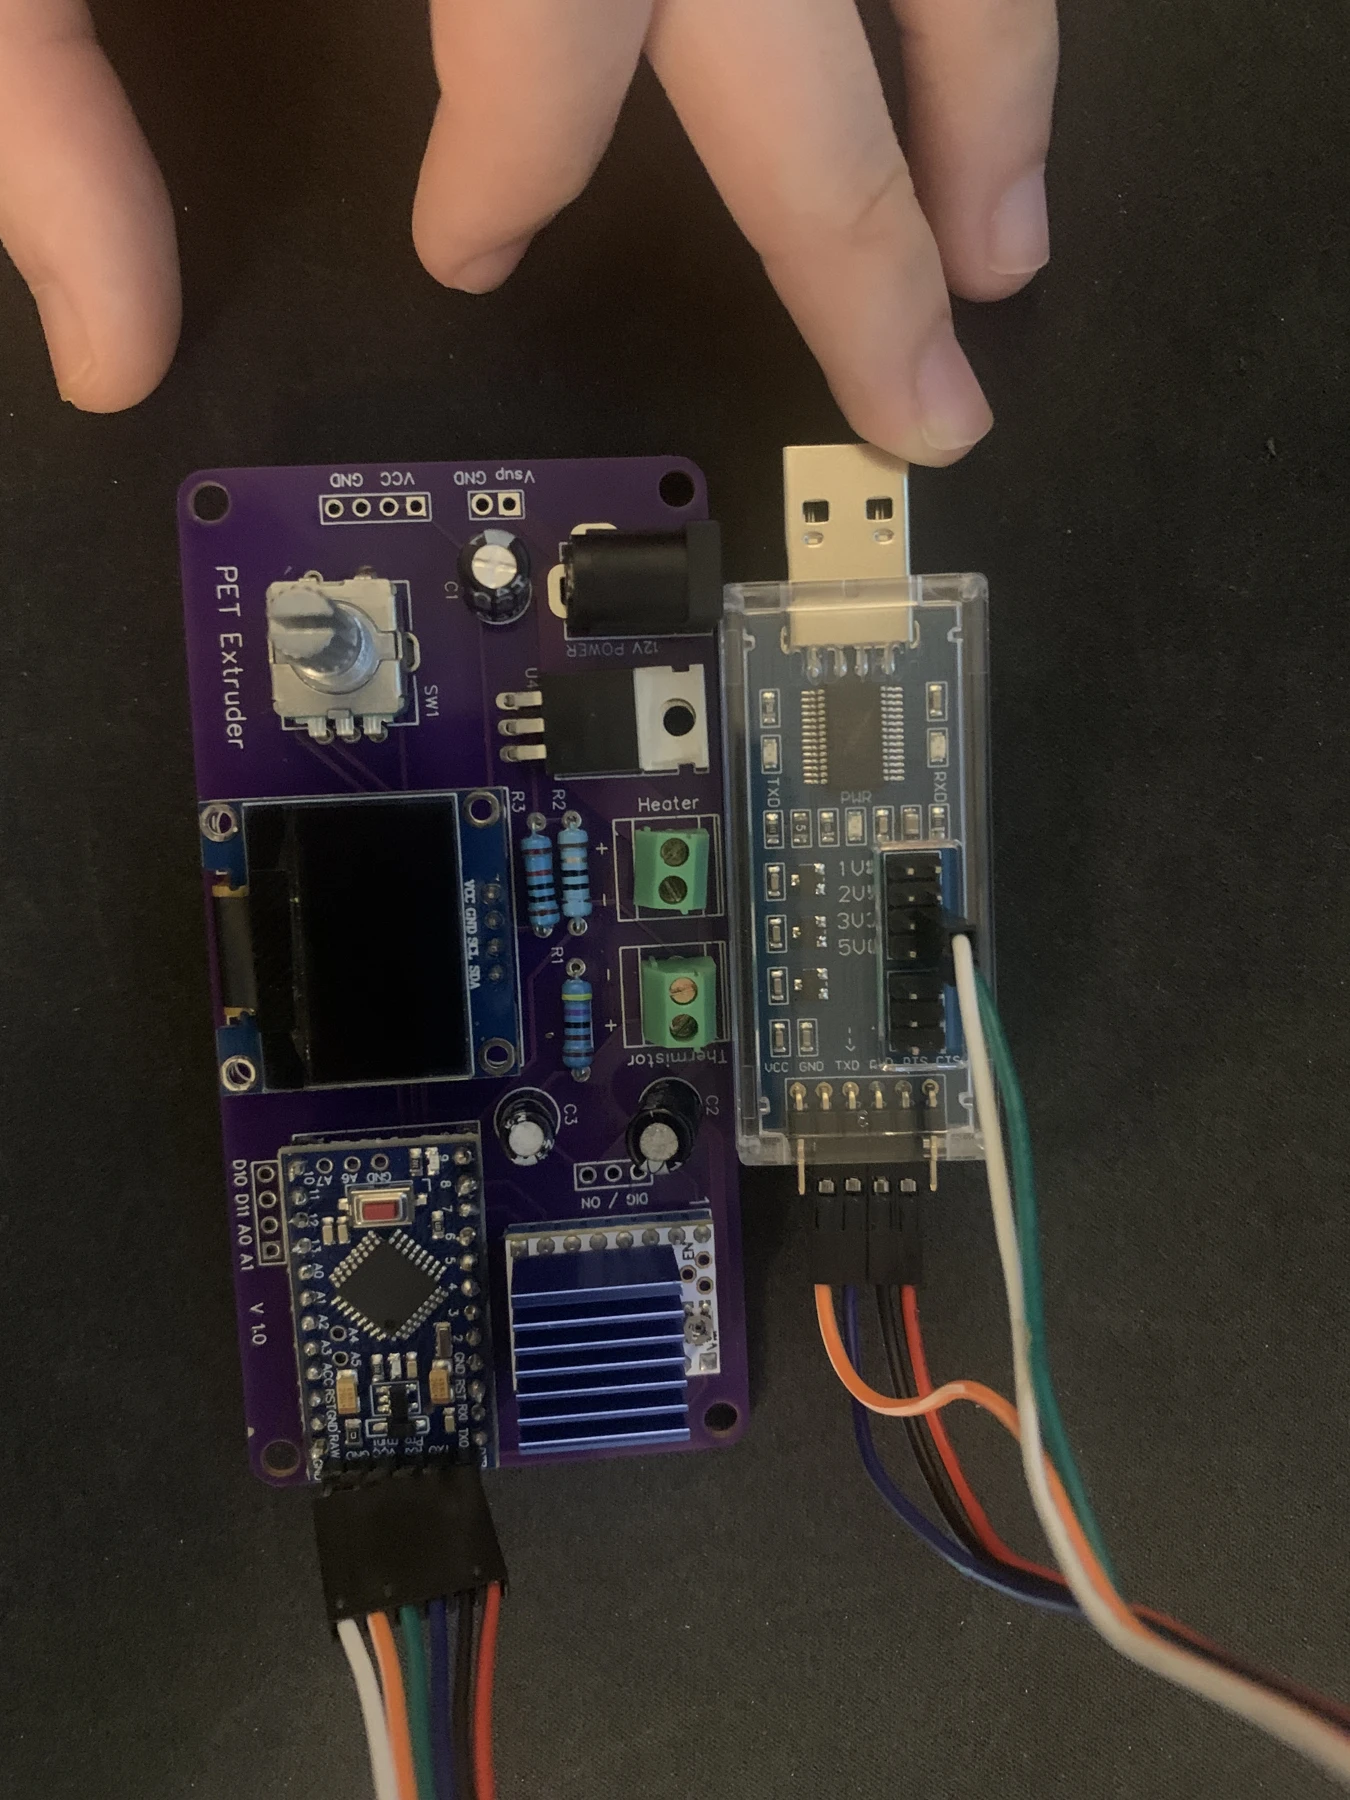
From the breadboard I moved to a populated controller board, which replaced the wiring mess and puts temperature control, reel motion and the operator interface in one place.
The firmware reads the thermistor, runs a PID loop to hold temperature and drives the heater over PWM. In parallel it steps the reel motor and reads the rotary encoder, so temperature, speed and direction can be dialed in on the fly. It currently defaults to a 220°C setpoint with a 190–230°C working range. Those are settings I’ve tuned by hand, not numbers from a measured process window yet.
Turning a bottle into filament
The published process is careful about preparation. The label and any residue come off first (acetone works well), and rippled bottles are smoothed with a little heat and a drop of water inside to pressurise them slightly, with gloves on and care around hot steam. The hot end is preheated to about 220°C, the strip is fed through with pliers and tied onto the reel, and the reel motor pulls it the rest of the way. A reel speed of 22 is reported to work well.
The published prints are a benchy and a calibration cube. The filament comes out hollow rather than solid, so the slicer’s flow rate has to rise to around 135%, and the reported print temperatures are 260°C at the hot end and 70°C on the bed. The results are described as usable for home projects, though less consistent than factory filament, with some stringing and under-extrusion.
Those are the design’s numbers, not mine. I haven’t run my own prints yet, so I’m treating them as starting points.
Where it stands
The mechanical side is built: 16 printed parts covering the cutter, reel, motor mount, hot-end holder and enclosure. What’s left is dialing in a consistent filament diameter and proving out a full print with it. I haven’t measured throughput or print quality, so I’m not claiming either until I have numbers.